Key Takeaways
- String lights create instant ambiance: Affordable LED string lights from discount stores transform any venue into a magical space when hung at varying heights and draped across ceilings or walls.
- Natural materials cost nothing but look expensive: Collect free pinecones and evergreen branches from your property or local parks, then enhance them with spray paint for sophisticated centerpieces and garland.
- Layer candles and mirrors for maximum impact: Group candles in different heights on reflective surfaces to double their glow and create luxury aesthetics at budget-friendly prices.
- DIY paper snowflakes add whimsical charm: Create stunning installations using only cardstock, scissors, and fishing line—host a crafting party with your wedding party to make hundreds while bonding.
- Faux fur and mason jars elevate simple elements: Drape inexpensive faux fur throws over chairs and fill mason jars with layered winter materials to achieve high-end looks without the cost.
- Strategic planning beats unlimited spending: Start gathering materials 2-3 months early, mix and match ideas based on your venue, and focus on cohesive color palettes rather than expensive individual pieces.
Planning a winter wedding on a budget doesn’t mean sacrificing style or sophistication. You can create a stunning winter wonderland atmosphere without draining your savings account. The key lies in choosing decor elements that offer maximum visual impact while keeping costs minimal. Smart shopping, creative DIY projects, and strategic placement can transform affordable materials into showstopping decorations that rival high-end wedding designs.
Winter weddings offer natural advantages that summer ceremonies lack. The season itself provides a beautiful backdrop with its crisp air and potential for snow-dusted scenery. This means you need less artificial decoration to create ambiance. Your guests already expect cozy, intimate settings during winter months, making it easier to work with what you have. Seasonal items like pinecones, evergreen branches, and winter berries are often available at little to no cost, yet they photograph beautifully and add authentic charm.
Below you’ll find seven budget-friendly winter wedding decor ideas that create luxury appeal without the luxury price tag. These options range from lighting techniques to natural elements, each offering ways to elevate your venue’s appearance. You’ll discover how to maximize impact with minimal spending, turning ordinary materials into extraordinary decorations. Each idea includes practical tips for implementation and ways to adapt them to your specific venue and vision.
- Key Takeaways
- String Lights and Fairy Light Canopies
- Pinecone and Evergreen Arrangements
- Candlelight in Varying Heights
- DIY Paper Snowflake Installations
- Faux Fur Accents and Throws
- Winter Branch and Twig Centerpieces
- Mason Jar Winter Displays
- Making Your Winter Wedding Dreams Reality
- Frequently Asked Questions
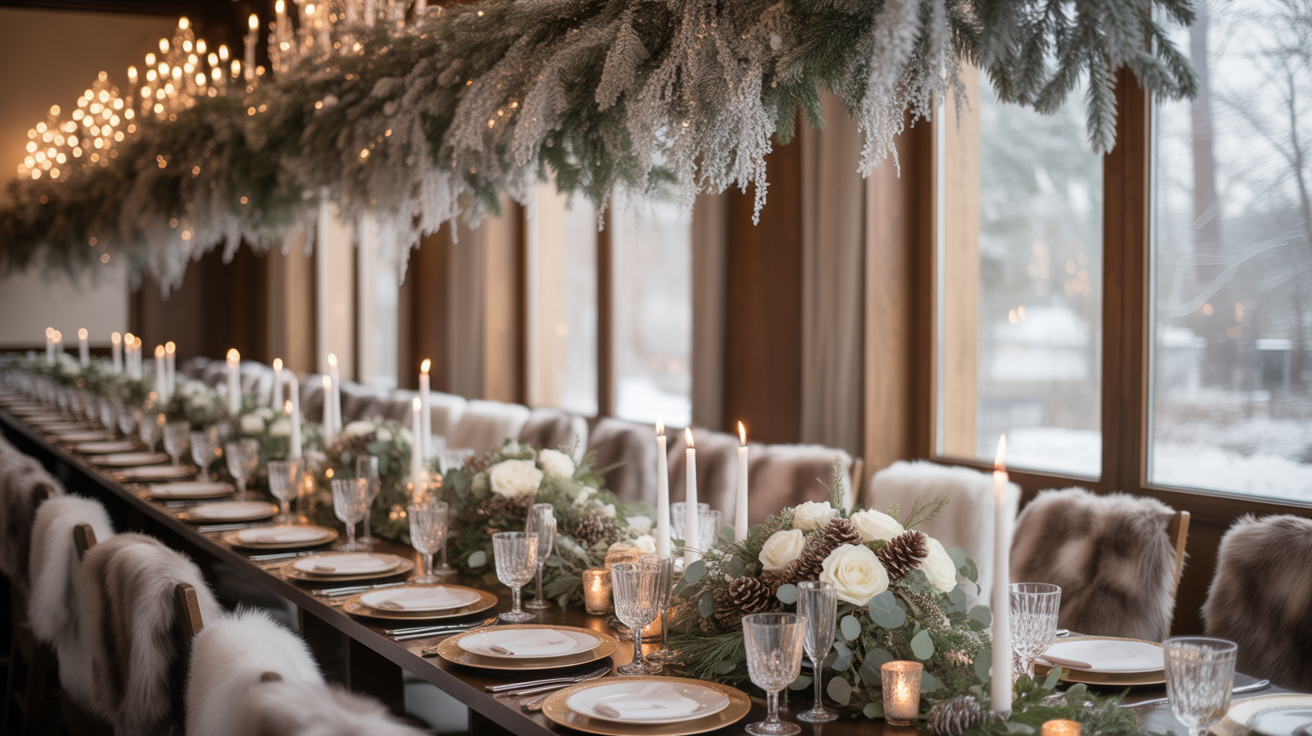
String Lights and Fairy Light Canopies
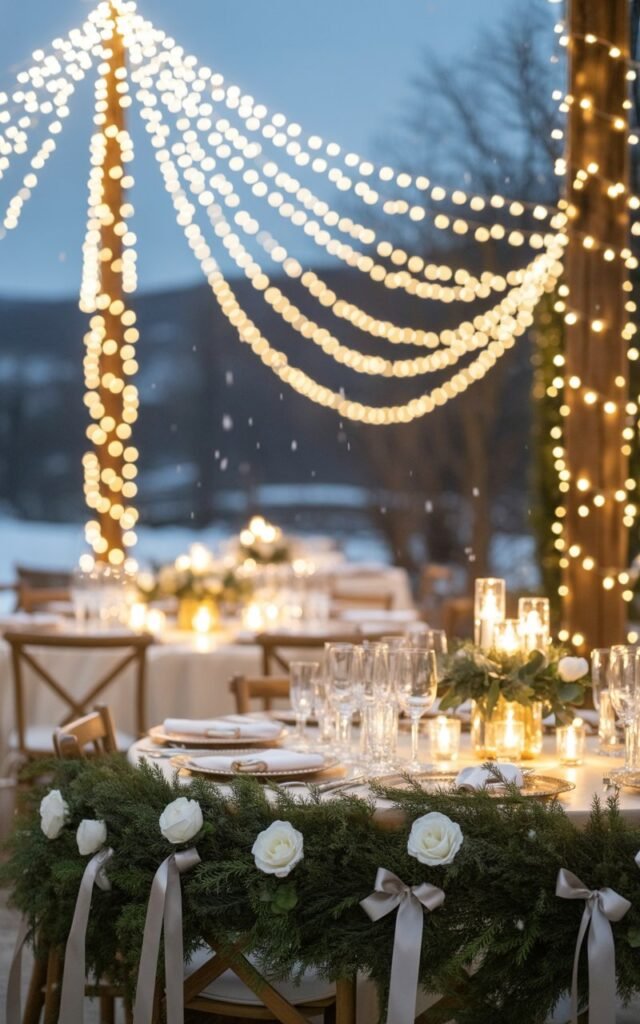
Transform any venue into a magical space with string lights. This simple addition creates warmth and romance without requiring a massive budget. You can purchase affordable LED string lights from discount stores or online retailers, often for less than twenty dollars per strand. The return on investment is remarkable—these lights photograph beautifully and instantly elevate the atmosphere.
Creating Depth and Dimension
Hang lights at varying heights throughout your venue. Drape them across ceilings, wrap them around columns, or create curtain effects along walls. This layering technique adds depth to your space. The multiple light sources create a soft, flattering glow that makes everyone look their best in photos.
Color Temperature Matters
Choose warm white lights rather than cool white or colored options. Warm tones complement winter skin tones and create a cozy atmosphere. Cool white lights can feel harsh and clinical, working against the intimate mood you’re trying to achieve.
Different lighting patterns work for different venues:
- Ceiling Canopies: Drape lights across the ceiling in a grid pattern for full coverage
- Vertical Drops: Hang lights vertically from ceiling to floor for dramatic effect
- Wrapped Elements: Wind lights around existing architectural features
- Table Runners: Lay battery-operated fairy lights down table centers
Most rental venues allow you to install temporary lighting with removable hooks. Visit your venue beforehand to identify the best anchor points. Battery-operated options eliminate the need for outlet access, giving you more flexibility in placement.
Pinecone and Evergreen Arrangements
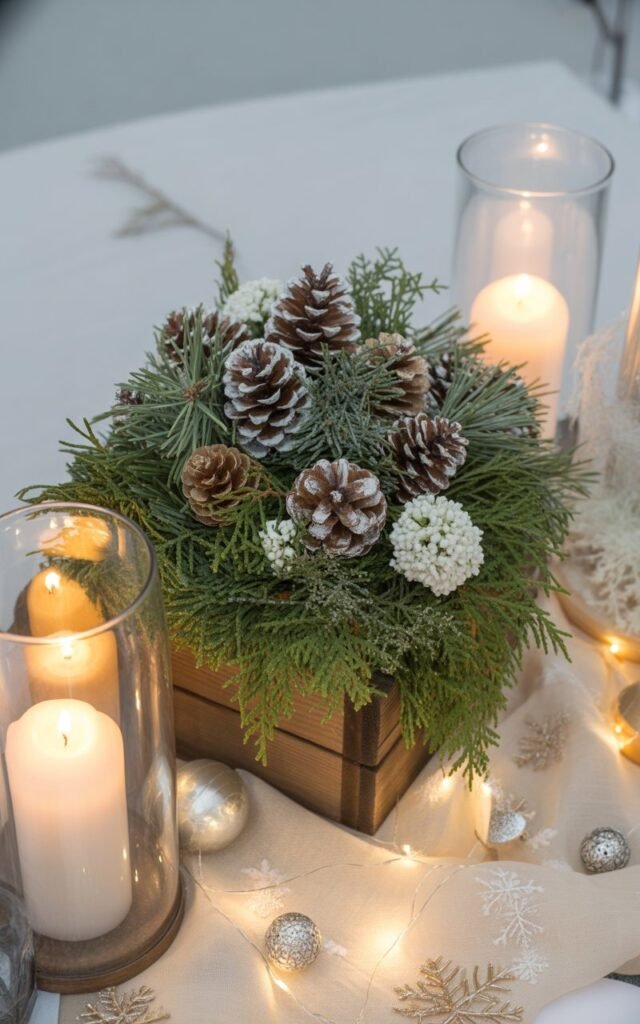
Nature provides free decor materials if you know where to look. Pinecones and evergreen branches cost nothing when gathered from parks or your own property. These elements instantly communicate winter elegance while maintaining a budget-friendly approach. The organic textures add visual interest that manufactured decorations can’t replicate.
Gathering and Preparing Materials
Collect pinecones during fall and early winter. Bake them at 200 degrees for thirty minutes to eliminate insects and open them fully. This preparation step is crucial—nobody wants unexpected guests at their wedding. Store them in breathable bags until needed.
Evergreen branches can be trimmed from trees in your yard or purchased inexpensively from garden centers. Many Christmas tree lots will give away trimmings for free after cutting trees. Ask around—you’ll be surprised what people are willing to donate.
Assembly Techniques
Wire pinecones together for garland effects or glue them to foam bases for centerpieces. Combine different sizes for visual variety. Add sprigs of evergreen between pinecones to fill gaps and introduce color contrast. The green against brown creates natural sophistication.
Spray paint some pinecones in metallic gold or silver for added glamour. This costs minimal money but significantly upgrades the look. Mix painted and natural cones for balanced appeal. You can also dust them lightly with fake snow for enhanced winter atmosphere.
Place these arrangements along tables, on mantels, or at ceremony entrances. Group them in odd numbers—three or five clusters work better than even numbers. This follows basic design principles that make arrangements feel intentional rather than random.
Candlelight in Varying Heights
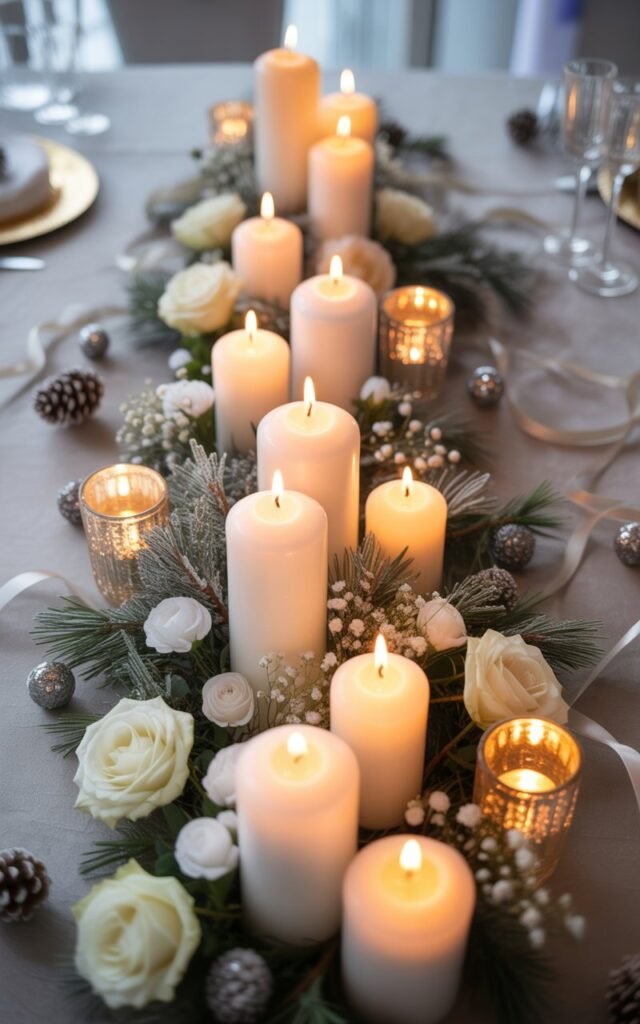
Candles deliver luxury aesthetics at budget-friendly prices. The flickering light creates romance and warmth that electric alternatives cannot match. Purchase pillar candles in bulk from wholesale stores where you’ll find them for a fraction of retail prices. Mix different heights to create visual interest and dynamic tablescapes.
Safety First Considerations
Check your venue’s candle policy before committing to this idea. Some locations prohibit open flames due to fire codes. If flames aren’t allowed, LED candles with realistic flickers now look surprisingly convincing. You sacrifice some authenticity but maintain the visual effect.
Group candles on mirrors or glass plates to amplify their glow. The reflection doubles the light output and creates an illusion of more candles than you actually have. This trick works especially well for centerpieces.
Layer different candle types for maximum impact:
- Pillar Candles: Provide height and structure
- Votives: Fill in gaps and add intimate lighting
- Tea Lights: Scatter along tables or pathways
- Taper Candles: Add elegance in candlesticks
Dollar stores carry surprisingly good quality candles in neutral colors. Stick with ivory, white, or champagne tones that photograph well and match any color scheme. Avoid scented candles at weddings—competing fragrances can overwhelm guests and interfere with food.
Arrange candles in clusters rather than spacing them evenly. This concentrated approach creates focal points and makes a bigger statement. You’ll need fewer candles overall while achieving greater impact. Place them in hurricane vases to protect flames from drafts and add another layer of sophistication.
DIY Paper Snowflake Installations
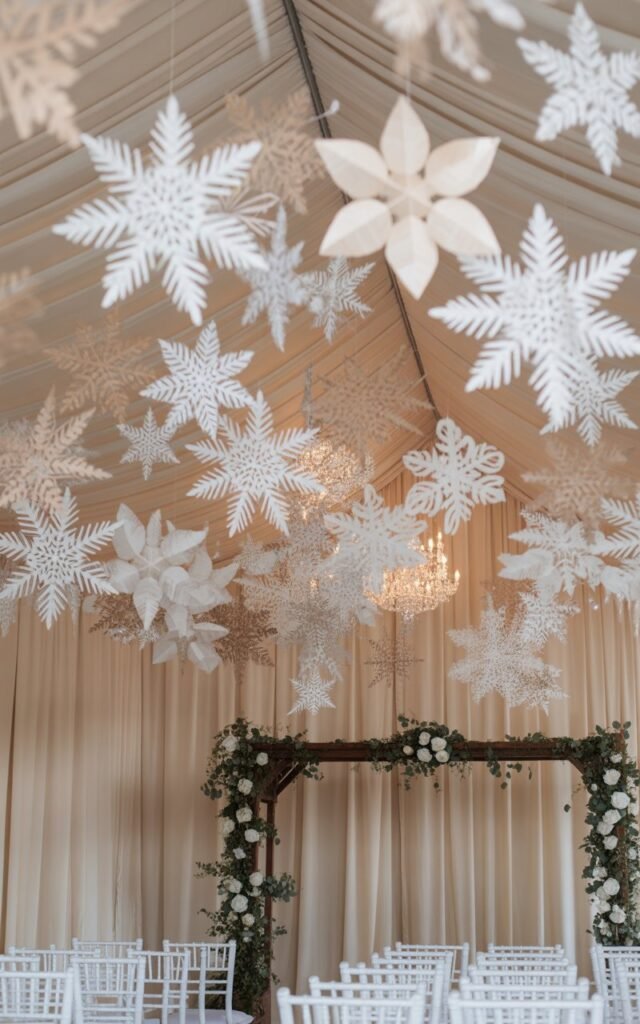
Paper snowflakes bring whimsical charm to winter weddings at practically no cost. This craft project requires only paper, scissors, and fishing line for hanging. The final result looks intricate and intentional, far more expensive than the materials suggest. Guests appreciate the handmade touch that adds personality to your celebration.
Creating Various Sizes
Cut snowflakes in multiple sizes from 4 inches to 24 inches in diameter. The size variation prevents monotony and creates visual flow. Larger snowflakes make bold statements while smaller ones fill spaces and add delicate details. Use white cardstock for sturdier snowflakes that maintain their shape better than regular paper.
Host a snowflake-making party with your wedding party. This turns decor preparation into a fun group activity. Everyone can contribute while spending quality time together. Play music, serve snacks, and make an evening of it. You’ll finish with hundreds of snowflakes and great memories.
Strategic Placement
Hang snowflakes at different heights from the ceiling using clear fishing line. This creates a floating effect that mimics actual snowfall. Cluster some together while leaving others isolated. The varied spacing adds authenticity—real snow doesn’t fall in perfect patterns.
Attach smaller snowflakes to windows, mirrors, or walls with removable adhesive. They catch light beautifully and add dimension to flat surfaces. Create a backdrop for photos by hanging a dense collection of snowflakes behind your sweetheart table or ceremony arch.
Consider using metallic or pearl cardstock for some snowflakes. The subtle shimmer catches light and elevates the overall look. Mix these special snowflakes with plain white ones—about one metallic for every four white creates good balance. Spray adhesive and glitter can also upgrade plain paper, though this adds messiness to the project.
Faux Fur Accents and Throws
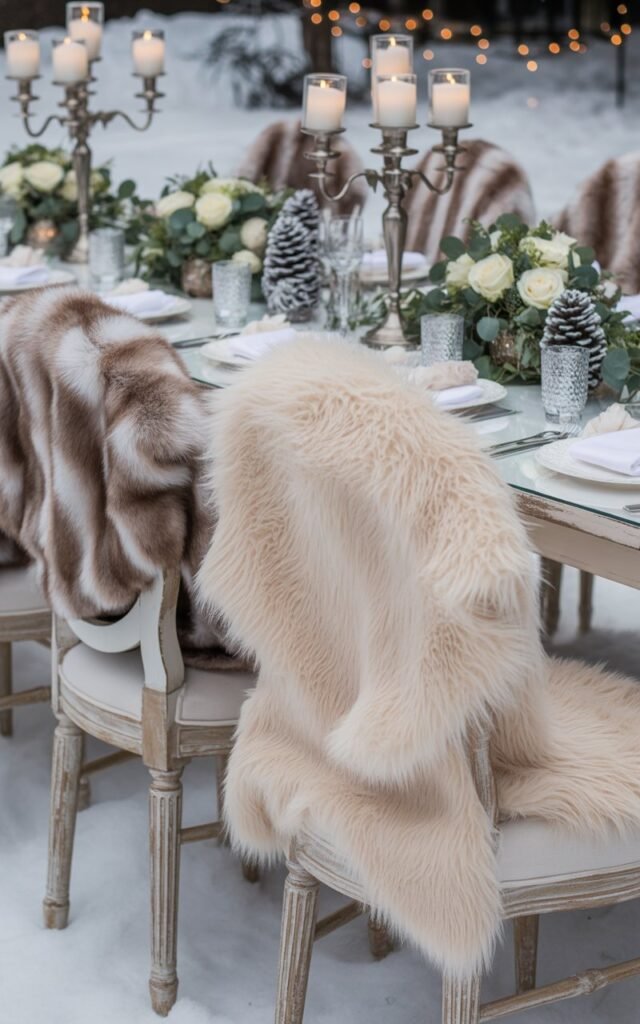
Faux fur adds instant luxury to winter weddings without the cost or ethical concerns of real fur. These soft textures create cozy, upscale vibes that guests associate with expensive venues. Purchase faux fur throws from discount home stores where they’re often available for under twenty dollars each. The initial investment pays off with significant visual return.
Multiple Application Methods
Drape throws over ceremony chairs for the wedding party. This simple touch photographs beautifully and provides actual warmth if your ceremony is outdoors or in a drafty venue. Fold throws loosely rather than arranging them perfectly—this casual draping looks more natural and sophisticated.
Use faux fur as table runners for an unexpected textural element. The contrast between soft fur and hard table surfaces creates interesting visual tension. This works especially well for head tables or gift tables where you want to draw attention.
Layer fur over existing furniture to upgrade rental pieces. That basic folding chair becomes instantly more appealing with a fur covering. The transformation costs minimal money but makes a substantial difference in photographs. You can also place small fur pieces on cocktail tables as decorative accents.
Choose neutral colors like ivory, champagne, or light gray. These shades photograph well and complement most color schemes. Avoid bright whites which can look stark in winter lighting. The slightly off-white tones feel warmer and more inviting.
Borrow throws from friends and family to supplement purchased pieces. Most people have at least one decorative throw at home. This approach lets you cover more surfaces without additional expense. Just make sure all furs have similar texture and color for cohesive appearance.
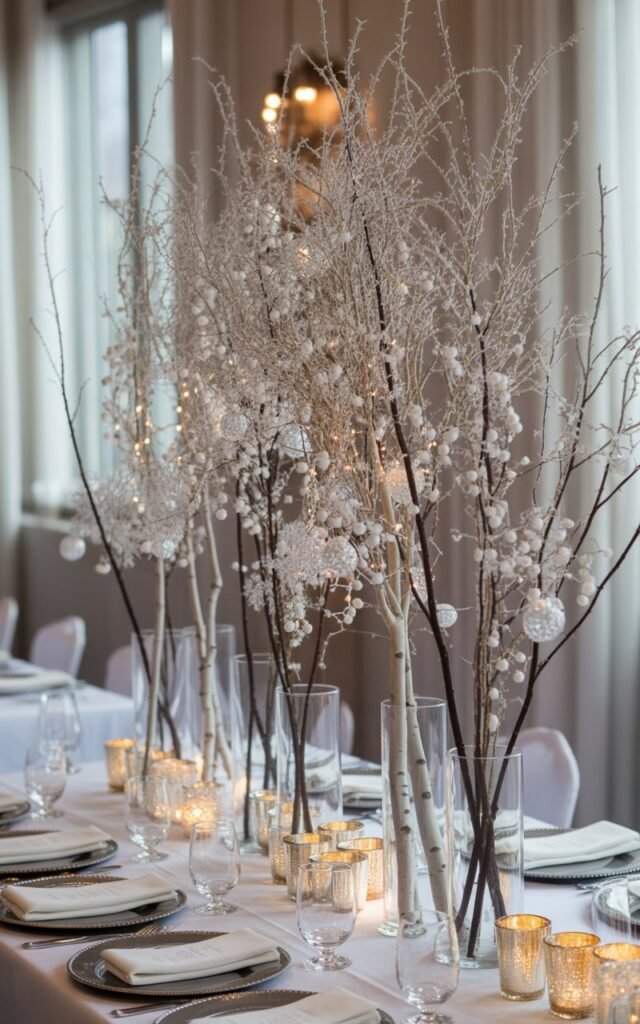
Winter Branch and Twig Centerpieces

Bare branches create stunning centerpieces that cost almost nothing but look incredibly sophisticated. This minimalist approach works perfectly for winter weddings where simplicity often translates to elegance. Collect branches from your yard or public spaces, then spray paint them white, silver, or gold for polished appearance.
Branch Selection and Preparation
Choose branches with interesting shapes and multiple offshoots. The natural asymmetry creates artistic appeal that perfect symmetry cannot achieve. Look for branches that spread horizontally rather than growing straight up—these create better visual balance in centerpieces.
Clean branches thoroughly before bringing them indoors. Scrub off loose bark and check for insects. Let them dry completely before painting. This preparation prevents unwanted surprises and makes the paint adhere better to the surface.
Arranging for Maximum Impact
Place branches in tall vases filled with sand, rocks, or floral foam to hold them upright. Glass vases work particularly well because guests can see through them, maintaining an airy feel. The transparency prevents the arrangement from feeling heavy or overwhelming.
Hang small ornaments, crystals, or tea lights from branches to add sparkle. These additions catch light and create focal points without requiring many materials. A few well-placed decorations have more impact than covering every branch.
Some effective enhancement options include:
- String Lights: Wrap battery-operated lights around branches
- Hanging Crystals: Attach with fishing line for sparkle
- Paper Flowers: Add subtle color and softness
- Ribbon Bows: Introduce your wedding colors
Group three or five branches together for larger arrangements. Odd numbers create better visual balance than even numbers. Vary the heights so some branches stand taller while others fill in the middle ground. This layering technique makes arrangements look professionally designed.
Mason Jar Winter Displays
Mason jars offer versatile, budget-friendly containers that work for countless wedding decor applications. These humble jars cost just a few dollars each but can be transformed into stunning centerpieces or accent pieces. Fill them with winter-themed materials to create seasonal displays that look far more expensive than they are.
Filling Ideas That Impress
Layer different materials inside jars for visual depth. Start with Epsom salt at the bottom to simulate snow, add pinecones or cranberries in the middle, then top with evergreen sprigs. This layering creates complexity that catches the eye and holds attention.
Battery-operated fairy lights placed inside jars create glowing centerpieces. The glass diffuses the light beautifully while the jar contains the wires neatly. This option eliminates fire safety concerns while maintaining romantic ambiance.
Float candles in jars filled with water and cranberries. The red berries add color while the floating candle creates movement and light. This simple arrangement looks polished and intentional. Just remember to use real candles—LED versions don’t float convincingly.
Customization Options
Tie ribbons, twine, or lace around jar necks for finishing touches. These small details elevate the jars from ordinary to special. Choose materials that match your wedding colors or stick with neutral options like burlap and ivory lace for classic appeal.
Paint jar lids in metallic colors for cohesive look. Gold or silver lids transform ordinary jars into decorative pieces. This costs just a few dollars for spray paint but makes significant visual difference. You can also leave lids off entirely for more casual aesthetic.
Group jars in clusters of varying sizes. Combine quart, pint, and half-pint jars for dimensional interest. Place the tallest jar in back or center, with shorter jars surrounding it. This arrangement creates focal points while maintaining balanced composition.
Making Your Winter Wedding Dreams Reality
Your budget doesn’t determine your wedding’s beauty—your creativity does. These seven decor ideas prove that stunning winter weddings happen through smart choices rather than unlimited spending. Each suggestion offers ways to maximize visual impact while respecting financial constraints. The results rival expensive professional decorating at a fraction of the cost.
Mix and match these ideas based on your venue, personal style, and available resources. Not every wedding needs all seven elements. Select the options that resonate with your vision and work within your specific circumstances. The handmade touches and thoughtful details will make your wedding memorable in ways that money alone cannot buy. Your guests will remember the warmth and personal touches far longer than they’d remember expensive floral arrangements.
Frequently Asked Questions
Q: How far in advance should I start preparing DIY winter wedding decor? A: Start at least two to three months before your wedding date. This gives you time to collect materials, complete projects without rushing, and make adjustments if needed. Some items like pinecones should be gathered even earlier during fall.
Q: Can I use real candles if my venue doesn’t allow open flames? A: No, you’ll need to use LED flameless candles instead. Modern LED candles now feature realistic flicker effects that look convincing in photos. Choose high-quality versions with warm light for the best results.
Q: Where can I find inexpensive faux fur throws for wedding decor? A: Check discount home stores like HomeGoods, TJ Maxx, or Marshall’s where faux fur throws often sell for $15-25. Online retailers and big-box stores also offer affordable options, especially during winter months.
Q: How do I keep paper snowflakes from looking cheap or childish? A: Use high-quality cardstock instead of regular paper, create intricate cutting patterns, and vary the sizes significantly. Metallic or pearl cardstock adds sophistication. Hang them at different heights with invisible fishing line for an elegant floating effect.
Q: What’s the best way to transport branches without damaging them? A: Wrap branches loosely in old sheets or blankets and transport them lying flat in a vehicle. Avoid cramming them into small spaces. If some branches break during transport, you can often incorporate the smaller pieces into other arrangements.
Q: How many mason jars do I need for table centerpieces? A: Plan for 3-5 jars per table depending on table size. Smaller cocktail tables need just 1-2 jars, while larger dining tables look better with grouped arrangements. Calculate your total table count and multiply accordingly.
Q: Can I rent string lights instead of buying them? A: Yes, many party rental companies offer string light rentals. Compare rental costs to purchase prices—sometimes buying is actually cheaper, especially if you can resell the lights after your wedding or use them for home decor.
Q: What should I do with leftover wedding decor after the ceremony? A: Sell items on wedding resale websites or local marketplace groups. Donate to couples getting married after you. Keep some pieces as home decor or save them for anniversary celebrations. Many brides recoup significant costs by reselling their decor.
Q: How do I make budget decor look cohesive rather than random? A: Stick to a consistent color palette of 2-3 colors. Repeat similar materials throughout different decor elements. Use the same style of ribbon or twine across all projects. This repetition creates intentional cohesiveness.
Q: Are winter weddings actually cheaper than summer weddings? A: They can be. Many venues offer off-season discounts for winter dates. Seasonal flowers and decor materials cost less. However, you might spend more on heating or guest accommodations, so calculate your specific situation carefully.