Creating your own wedding table decorations offers something store-bought options simply can’t match – the perfect blend of personal style and budget consciousness. More couples are discovering that handmade touches not only save thousands of dollars but also infuse their celebration with genuine personality. The satisfaction of crafting beautiful decorations with your own hands adds an extra layer of meaning to your special day.
The beauty of DIY wedding decorations lies in their flexibility. You control every detail, from color choices to materials, ensuring each element perfectly matches your vision. Whether your style leans toward rustic charm, modern minimalism, or vintage romance, handmade decorations can be customized to fit any theme. Plus, the process itself becomes part of your wedding story – those crafting sessions with friends and family create cherished memories before the big day even arrives.
In the following sections, we’ll walk through six creative table decoration projects that transform ordinary materials into stunning centerpieces and accents. From romantic candle displays to elegant place cards, these ideas prove that professional-looking results don’t require professional prices. Each project includes clear instructions, helpful tips, and variations to suit different skill levels and time constraints. Ready to turn your reception tables into works of art? Let’s start crafting.
- Essential Materials and Tools for DIY Wedding Table Decorations
- Romantic Candle Centerpieces You Can Create
- Fresh and Faux Flower Arrangements
- Elegant Place Cards and Menu Displays
- Unique Table Runner and Linen Ideas
- Budget-Friendly Finishing Touches
- Final Thoughts on DIY Success
- Frequently Asked Questions
Essential Materials and Tools for DIY Wedding Table Decorations
Walking into a craft store can feel overwhelming when you’re planning wedding decorations. The endless aisles of supplies might leave you wondering where to begin. Smart shopping starts with understanding exactly what you need before you fill that cart. Most DIY table decorations require surprisingly few specialized tools, and many supplies work across multiple projects.
Basic craft supplies you’ll need
Your foundation toolkit should include sharp scissors, a reliable hot glue gun with plenty of glue sticks, floral wire, and wire cutters. Double-sided tape works wonders for delicate materials, while craft foam provides structure for various projects. Clear fishing line creates invisible hanging mechanisms, and ribbon in your wedding colors ties everything together beautifully.
Quality matters more than quantity with these basics. One excellent pair of scissors beats three mediocre pairs. A temperature-adjustable glue gun prevents damage to delicate materials like silk flowers or thin fabrics. Invest in tools you’ll use repeatedly rather than buying every gadget that catches your eye.
Where to source materials affordably
Dollar stores hide surprising treasures for wedding crafters. Glass vases, candles, mirrors, and basic flowers often cost a fraction of specialty store prices. Wholesale flower markets provide fresh blooms at significantly reduced rates, especially if you shop early in the morning. Online bulk suppliers offer incredible deals on items like ribbon, lace, and artificial flowers when you buy in larger quantities.
Thrift stores and estate sales yield unique vintage pieces perfect for eclectic table settings. Mason jars, antique books, old picture frames, and interesting glassware appear regularly at these venues. Even fabric stores’ remnant bins contain beautiful materials perfect for smaller decoration projects.
Don’t overlook nature as your supplier. Branches, pinecones, stones, and dried flowers cost nothing but a pleasant walk outdoors. Seasonal items gathered months in advance and properly preserved add authentic touches that no store can replicate.
Setting up your workspace
A dedicated crafting area prevents the stress of constantly setting up and cleaning up supplies. Even a card table in a spare corner works if it stays assembled throughout your project timeline. Cover surfaces with disposable tablecloths or kraft paper for easy cleanup. Good lighting prevents eye strain during detailed work – a simple desk lamp makes intricate tasks much easier.
Organize supplies in clear containers or labeled boxes. Group materials by project rather than type – keeping everything for centerpieces together saves time hunting for pieces. A pegboard or wall organizer holds tools within easy reach while keeping workspace surfaces clear.
Time management for DIY projects
Starting early eliminates last-minute panic. Begin crafting at least three months before your wedding date. This timeline allows for mistakes, supply ordering delays, and the reality that some projects take longer than expected. Breaking large tasks into smaller sessions prevents burnout and maintains quality.
Consider which decorations can be completed far in advance. Paper goods, signage, and artificial flower arrangements store well for months. Fresh flower projects obviously wait until the week of your wedding, but practice runs using inexpensive blooms help perfect your technique. Schedule group crafting parties for repetitive tasks – making 150 favor bags goes faster with friends helping while sharing wine and conversation.
Test each project completely before committing to mass production. That Pinterest-perfect centerpiece might require skills or time you don’t have. Creating one full prototype reveals potential problems and allows adjustments before you’ve purchased supplies for twenty tables.
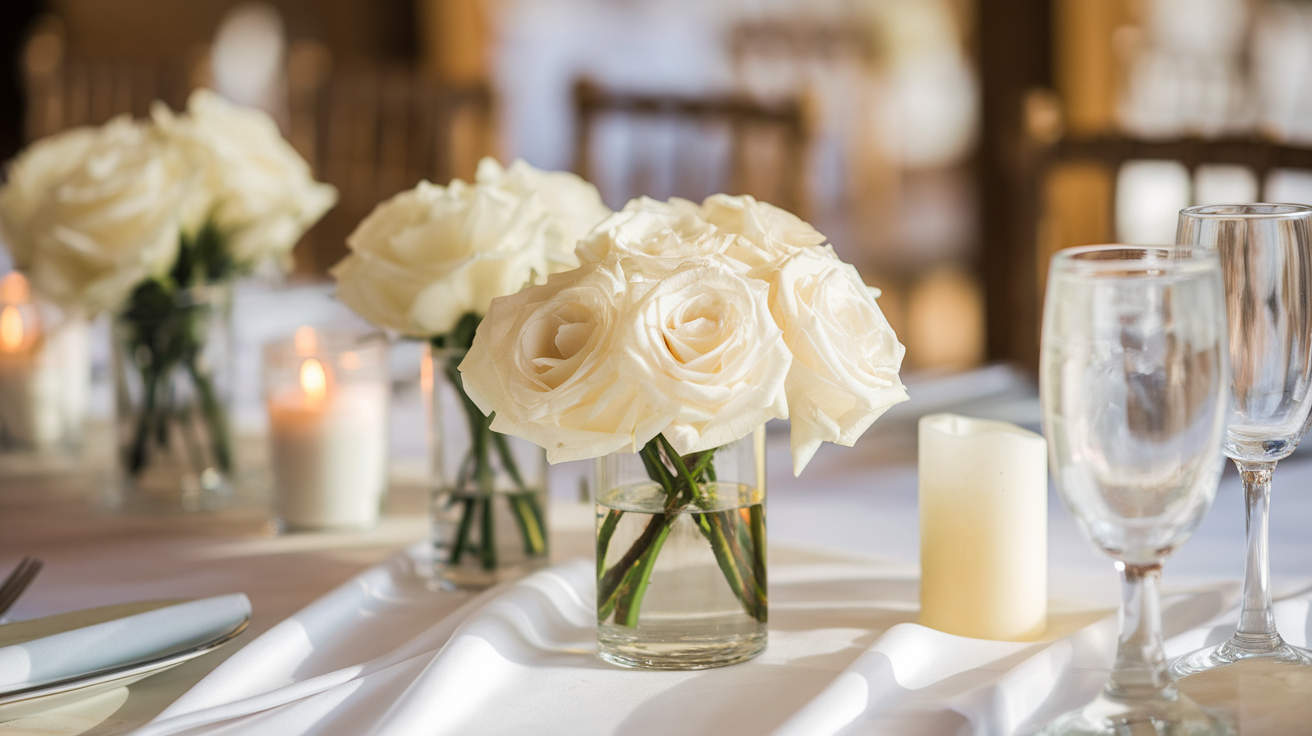
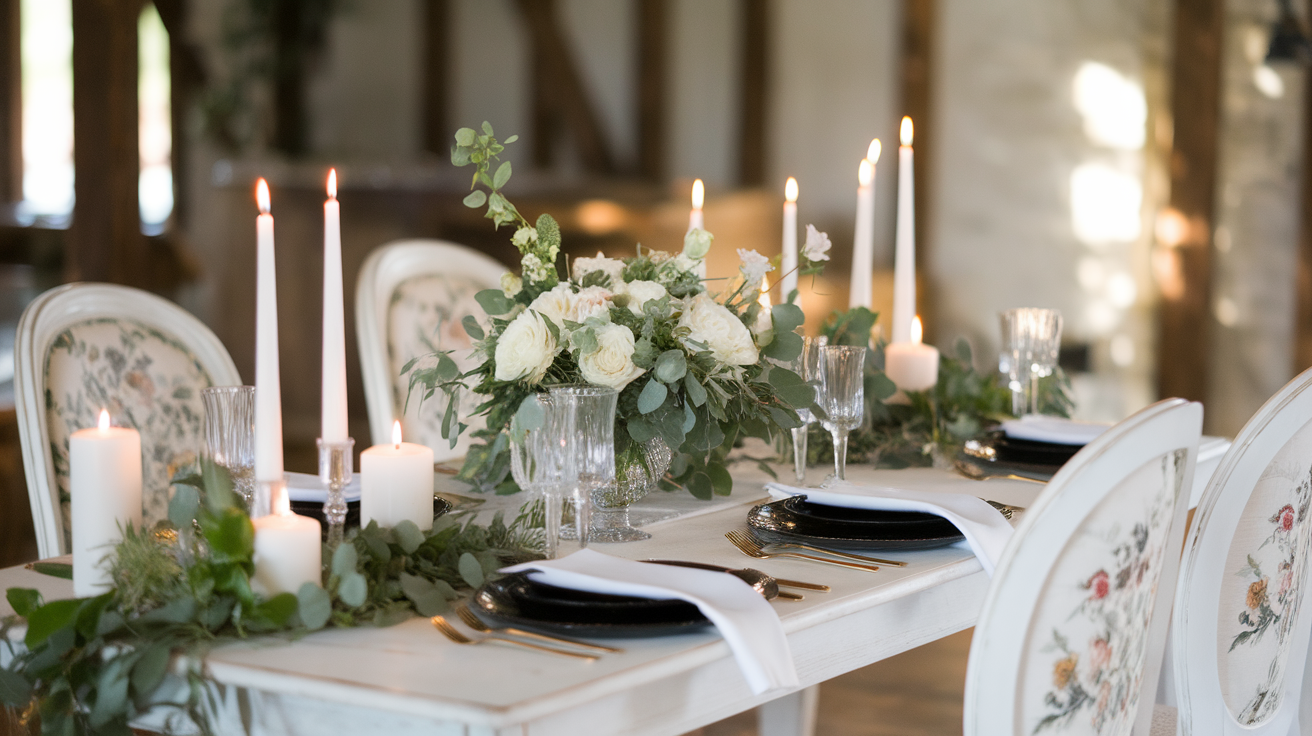
Romantic Candle Centerpieces You Can Create
Candlelight transforms any reception space into something magical. The warm glow softens faces, sparkles off glassware, and creates an intimate atmosphere even in large venues. Creating your own candle centerpieces allows complete control over height, color, and style while keeping costs remarkably low.
Floating candle arrangements
Water-filled bowls with floating candles offer simple elegance anyone can achieve. Wide, shallow bowls work better than tall vases, providing more surface area for visual impact. Fill containers about three-quarters full with water, leaving room for displacement when adding decorative elements.
Submerged flowers or greenery add color beneath the water’s surface. Orchids, roses, and carnations hold up well underwater for several hours. Weigh down stems with clear glass marbles or decorative stones to keep them from floating up. Small mirrors placed at the bottom of clear bowls amplify candlelight beautifully.
For extra sparkle, add a few drops of glycerin to the water – this creates a slightly thicker consistency that holds glitter in suspension longer. Food coloring tints water to match wedding colors, though test this beforehand as some dyes can stain.
Mason jar lanterns with lace
These rustic-romantic luminaries suit everything from barn weddings to garden parties. Wide-mouth mason jars provide the best proportions for candles. Start by wrapping jars with lace, securing it with small dots of hot glue rather than continuous lines – this creates a cleaner look.
Battery-operated LED candles eliminate fire hazards while providing consistent light throughout your reception. Many versions include timers, ensuring all centerpieces illuminate simultaneously. Real candles work too, but require more attention and venue approval.
Hang some jars at varying heights using wire wrapped beneath the rim. Others can sit directly on tables, perhaps grouped in odd numbers for visual interest. Fill the bottom inch with sand, coffee beans, or small pebbles to anchor candles and add texture. Tie raffia or satin ribbon around the neck for a finishing touch that coordinates with your color scheme.
Wine bottle candle holders
Empty wine bottles become elegant candle holders with minimal effort. Remove labels by soaking bottles in warm water with baking soda, then scraping gently. For stubborn adhesive, coconut oil or commercial adhesive remover works wonders.
Taper candles fit perfectly into bottle openings. Secure them with a small ring of melted wax or special bottle candle adapters available at craft stores. Painted bottles add color – spray paint adheres well to glass when applied in thin, even coats. Metallic paints like gold, silver, or copper create especially stunning effects in candlelight.
Group bottles of varying heights for dynamic centerpieces:
- Standard bottles: Use three to five together for balanced arrangements
- Mixed shapes: Combine wine, champagne, and spirits bottles for variety
- Color coordination: Clear, green, and amber glass creates beautiful gradients
- Added elements: Wrap bottles with twine, add charms, or glue on small pearls
Safety tips for candle displays
Fire safety requires serious consideration at any event. Check venue policies about open flames – many require enclosed candles or prohibit real flames entirely. Keep candles away from flowing fabrics, paper decorations, and centerpiece flowers that might dry out during the reception.
Hurricane glasses or clear cylinders protect flames from drafts while maintaining ambiance. These shields also prevent accidental contact with flames when guests reach across tables. Position candles where they won’t be knocked over during animated dinner conversations.
LED alternatives have improved dramatically in recent years. Quality versions flicker realistically and come in various “flame” colors. Remote controls allow you to adjust brightness or turn off candles without disturbing guests. While purists might prefer real flames, the safety and convenience of battery options makes them worth considering.
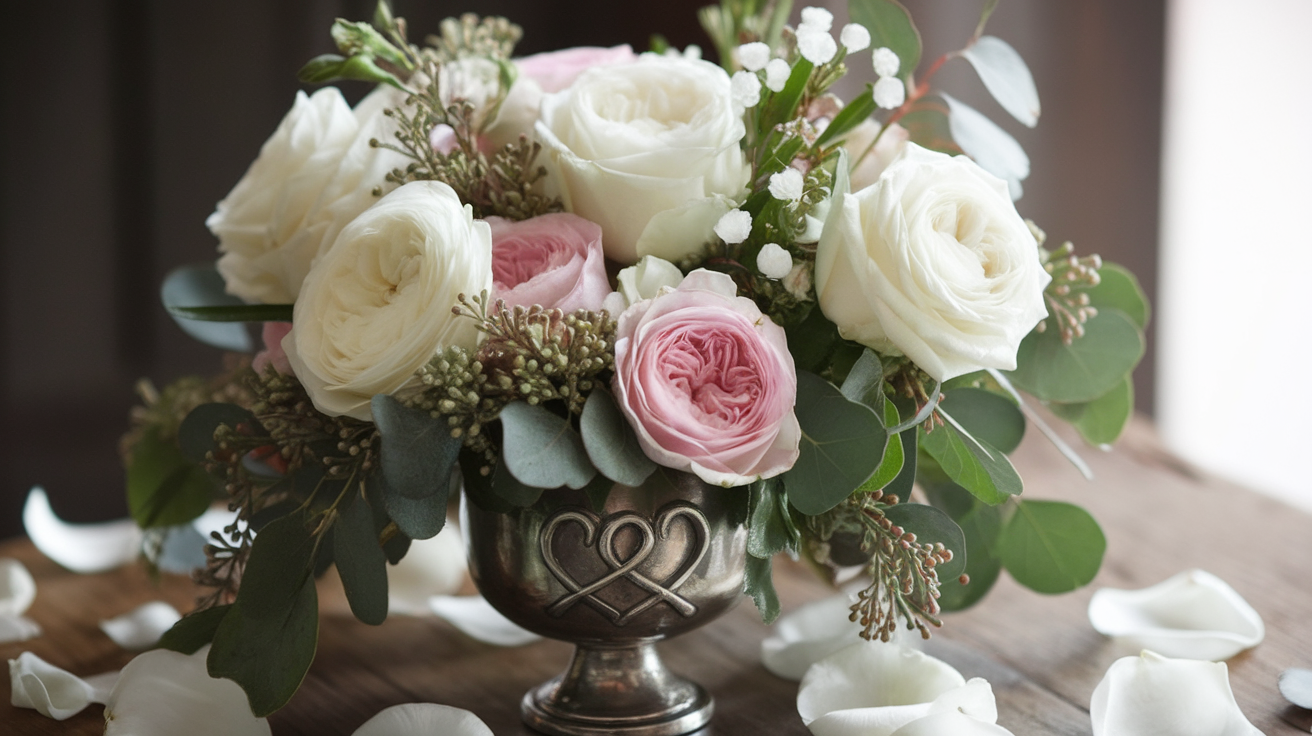
Fresh and Faux Flower Arrangements
Flowers remain the heart of most wedding decorations, but professional arrangements can consume huge portions of your budget. Creating your own allows for exactly the blooms you want without the shocking price tags. The key lies in choosing the right flowers and techniques for your skill level.
Choosing flowers that last
Some blooms naturally survive longer outside water, making them ideal for DIY arrangements prepared in advance. Carnations, chrysanthemums, and alstroemeria can last several days when properly conditioned. Roses, while more delicate, work well if you select ones just beginning to open.
Purchase flowers two to three days before your wedding for optimal freshness. Look for firm stems, vibrant colors, and petals without brown edges. Wholesale flower markets typically open very early but offer significantly better prices than retail florists. Online wholesale suppliers ship directly to you, though this requires more precise timing.
Conditioning flowers properly extends their life dramatically. Cut stems at an angle underwater, remove leaves below the waterline, and place in cool water with flower food overnight. Some flowers benefit from special treatment – hydrangeas love a quick dip in boiling water, while tulips prefer very cold water.
Simple bouquet techniques
Hand-tied bouquets look professionally made but require no special equipment. Start with your focal flowers – usually three to five larger blooms. Hold them together about six inches below the flower heads. Add smaller flowers and greenery around this center, turning the bouquet slightly with each addition to maintain even distribution.
The spiral technique creates especially polished results. Each stem crosses the previous one at a slight angle, creating a twisted effect that holds naturally. This method provides stability without requiring wire or excessive tape. Practice with grocery store flowers until you master the motion.
Once satisfied with your arrangement, wrap stems tightly with floral tape starting just below the flower heads. Cover this functional tape with ribbon, leaving some stem exposed at the bottom for a natural look. Secure ribbon with pearl pins rather than hot glue for a more refined finish.
Greenery garlands for table runners
Living table runners made from greenery cost far less than traditional flowers while creating dramatic impact. Eucalyptus, ivy, and ruscus stay fresh-looking throughout long receptions. These hardy greens also smell wonderful, adding another sensory element to your tables.
Start with a base of fishing line or thin wire running the table’s length. Attach greenery in overlapping segments using floral wire, creating fullness without gaps. Work in one direction for consistency. Tuck in accent flowers sparingly – too many creates visual chaos and increases costs significantly.
Pre-made garlands can be prepared the morning of your wedding if kept cool and misted. Lay them on damp towels in a cool room until needed. Transport flat in boxes lined with plastic to prevent water damage to vehicles.
Mixing real and artificial blooms
Quality silk flowers have become nearly indistinguishable from real ones. Combining artificial and fresh flowers stretches budgets while maintaining authentic beauty. Use silk for expensive or out-of-season blooms, fresh for everything else.
Position artificial flowers strategically within arrangements. Surround them with fresh greenery and flowers to mask any telltale signs of their synthetic nature. Dust silk flowers before use – nothing reveals fake flowers faster than a visible dust layer.
The best artificial flowers feature varied petal textures, realistic color gradations, and flexible stems. Avoid anything with obvious plastic centers or unnaturally uniform petals. Bend and shape leaves and petals to mimic nature’s imperfections.
Preserving fresh flowers
Timing matters enormously with fresh flower preparation. Most arrangements can be completed the day before if stored properly. Keep finished pieces in a cool room away from direct sunlight. Basements, air-conditioned rooms, or even walk-in coolers at restaurants work well.
Spray arrangements lightly with water every few hours. Cover loosely with plastic to maintain humidity without crushing delicate petals. Transport in boxes with sides high enough to protect blooms from wind and sun damage.
For flowers that must be arranged day-of, organize everything else in advance. Pre-cut foam, prepare containers, measure ribbon, and lay out tools. This preparation allows quick assembly when flowers arrive, reducing stress on your wedding morning.
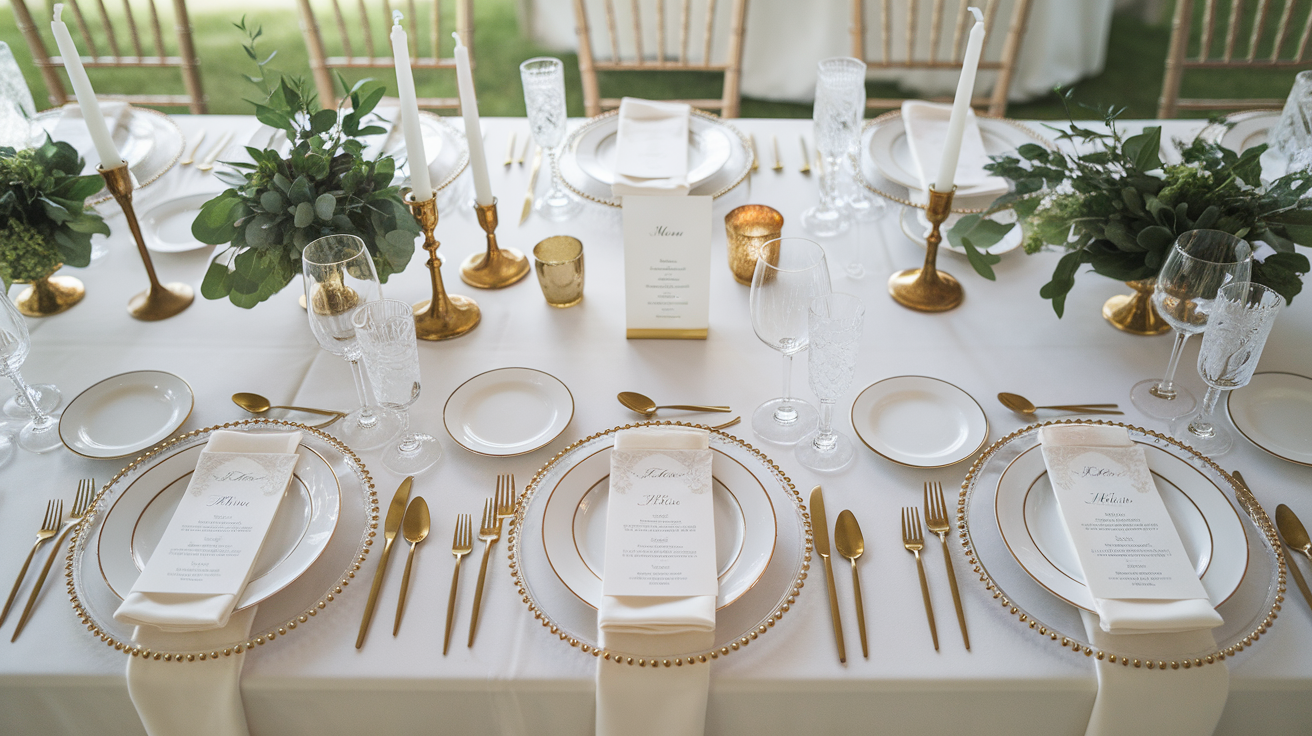
Elegant Place Cards and Menu Displays
Place cards and menus serve practical purposes while offering creative opportunities to impress guests. These small details show thoughtfulness and help establish your reception’s overall aesthetic. Handmade versions add personality impossible to achieve with standard printed cards.
Handwritten calligraphy alternatives
Beautiful lettering doesn’t require years of calligraphy practice. Modern calligraphy markers feature flexible tips that create thick and thin strokes automatically. Practice basic letterforms using free online tutorials, focusing on consistency rather than perfection. Your personal style adds charm that computer fonts lack.
For those lacking confidence in their handwriting, compromise solutions exist. Print names in attractive fonts on cardstock, then add hand-drawn flourishes or borders. Gold or silver gel pens add metallic accents that photograph beautifully. Watercolor washes behind printed text create artistic effects with minimal skill required.
Lettering stencils provide another option for uniform results. Position stencils carefully and use paint pens or markers for clean lines. This method works especially well for menu headers or table numbers where consistency matters more than individual character.
Natural materials for place cards
Nature provides countless place card holders at no cost. Small pinecones work wonderfully – simply tuck cards between scales or attach with thin wire. Smooth river rocks offer flat surfaces for writing names directly with permanent markers or paint pens.
Seasonal elements reflect your wedding date beautifully. Autumn weddings might feature names written on preserved leaves or attached to mini pumpkins. Spring celebrations could use flower seed packets as place cards guests take home. Summer weddings might incorporate shells, while winter events could feature names on ornaments.
Wood slices from fallen branches create rustic charm. Sand smooth and write names with wood burning tools or permanent markers. Stand cards in natural crevices or create slots with careful saw cuts. Seal with mod podge for longevity if you want guests to keep them as favors.
Wine corks split lengthwise hold cards perfectly when a slit is cut across the curved top. Collect these months in advance from friends and restaurants. The variety of cork stamps and stains adds visual interest when grouped together.
Creative menu presentation ideas
Individual menus at each place setting feel luxurious but multiply costs quickly with traditional printing. Instead, create one beautiful menu per table displayed in an attractive holder. Frames from thrift stores, painted to match your colors, elevate simple printed menus to art pieces.
Mirrors make stunning menu backgrounds. Write directly on glass with chalk markers for easy reading against any color tablecloth. This technique works equally well on windows, picture frames with glass, or dedicated menu boards.
Handwritten menus on kraft paper tied with twine suit casual celebrations. Print one master copy as a guide, then hand-letter copies for each table. Slight variations between tables add handmade charm rather than appearing as mistakes.
Consider unexpected formats that double as decorations:
- Bottle displays: Slip rolled menus inside empty wine bottles
- Fan menus: Fold accordion-style for guests to fan themselves at outdoor weddings
- Bookmark menus: Design long, thin menus guests can keep
- Napkin wraps: Print menus on paper strips that wrap around napkins
Incorporating guest names creatively
Place cards need not be cards at all. Guest names on unusual objects create conversation starters and potential favors. Small potted herbs or succulents with name tags attached to picks serve both purposes. Guests appreciate taking home living memories of your celebration.
Edible place cards delight guests while serving practical purposes. Names piped onto cookies, written on chocolate bars, or attached to locally-made honey jars feel special. These options work particularly well for smaller weddings where the cost per piece remains manageable.
Origami place cards showcase creativity while using inexpensive materials. Simple shapes like cranes, flowers, or hearts can be mastered quickly with online tutorials. Use papers in wedding colors or patterns that complement table linens. Write names on wings, petals, or bodies where they’re easily visible.
Photo place cards add personal touches, especially for smaller weddings. Childhood photos of guests, pictures of you with each guest, or images related to table themes create talking points. Print at home on cardstock or order prints during sales for cost efficiency.
Unique Table Runner and Linen Ideas
Table linens set the foundation for all other decorations but renting enough for a large wedding strains budgets quickly. Creative alternatives to traditional runners and overlays achieve similar visual impact at fraction of the cost. These approaches also allow more personalization than standard rental options.
Fabric alternatives to traditional runners
Books create literary-themed runners perfect for library or vintage weddings. Arrange old volumes down table centers, opened to meaningful pages or simply stacked at varying heights. Thrift stores and library sales provide plenty of options for under a dollar each.
Brown kraft paper rolls from office supply stores become customizable runners. Write messages, draw designs, or let guests doodle throughout dinner. Provide cups of colorful markers at each table. This interactive element entertains during cocktail hour and dinner lulls.
Lace doilies overlapped down table centers create vintage elegance. Mix sizes and patterns for collected-over-time appeal. Paper versions cost less than fabric while still photographing beautifully. Secure with tiny dots of double-sided tape to prevent shifting.
Mirrors reflect candlelight and centerpieces, doubling their visual impact. Long rectangular mirrors work as runners, while smaller round ones scattered down tables create constellation effects. Check thrift stores for old mirrors that can be repurposed.
Layering textures and patterns
Combining different materials adds depth without overwhelming tables. Start with solid-colored base linens, then add textured runners, finally placing patterned napkins or chargers. This graduated approach maintains sophistication while incorporating multiple elements.
Burlap paired with lace balances rustic and romantic aesthetics. The rough natural fiber grounds delicate lace, preventing it from appearing too precious. Cheesecloth offers similar textural interest with a softer, more ethereal quality that suits garden or beach weddings.
Sequined or metallic fabrics needn’t cover entire tables to make impact. Narrow strips catching light down table centers cost far less than full sequined tablecloths. Cut fabric with pinking shears to prevent fraying without hemming.
Adding personal touches to standard linens
Plain rental linens become special with simple additions. Ribbon woven through hemstitched edges takes minutes but transforms basic into beautiful. Choose grosgrain for preppy aesthetics, satin for elegance, or raffia for rustic appeal.
Stenciling designs onto white runners personalizes without permanent alteration. Create stencils from cardstock featuring your monogram, wedding date, or meaningful quotes. Use fabric paint in wedding colors, applied lightly with sponges for professional results.
Fresh greenery tucked under plates or woven between place settings brings life to tables. Rosemary, olive branches, or eucalyptus smell wonderful while adding organic texture. These additions cost little but create magazine-worthy tablescapes.
No-sew options for fabric decorations
Fabric glue and hemming tape eliminate sewing requirements for most linen projects. These products create strong bonds that withstand event wear when applied correctly. Follow package directions carefully, especially regarding drying times and heat settings.
Fringe adds movement and interest without any construction. Simply cut strips along fabric edges, leaving several inches uncut for stability. This technique works especially well with lightweight fabrics like chiffon or tulle that flutter with air movement.
Knotted fabric strips create three-dimensional texture. Cut fabric into long strips, then tie knots at regular intervals. Layer several strands for fuller coverage. This technique works beautifully along table edges or as chandelier decorations.
Safety pins hidden underneath allow temporary fabric gathering and draping. Pin from below so fasteners remain invisible to guests. This method lets you create swags, rosettes, and gathered sections without permanent alteration to rental linens.
Budget-Friendly Finishing Touches
Small details pull everything together, transforming individual elements into cohesive tablescapes. These finishing touches often cost mere pennies per piece but contribute significantly to overall ambiance. Strategic placement of these accents fills visual gaps without cluttering tables.
Scatter decorations and confetti
Table scatter adds sparkle between larger decorative elements. Purchase bulk sequins, small pearls, or metallic confetti shapes online for surprisingly low prices. A little goes far – just a pinch scattered around each place setting creates magical effect.
Natural scatter options cost nothing while supporting various themes. Flower petals preserved from practice arrangements, colorful autumn leaves, or beach glass and shells collected during walks provide unique texture. Coffee beans around candles smell amazing at morning weddings.
Create custom confetti from old books, maps, or sheet music using paper punches. Hearts, stars, or circles in various sizes layer beautifully. This personalized touch costs only time, and punching becomes meditative once you establish rhythm.
DIY napkin rings and holders
Napkin rings elevate table settings instantly. Simple ribbon tied in bows requires no tools beyond scissors. Choose wired ribbon that holds its shape, or add small charms, flowers, or greenery sprigs for extra detail.
Twine wrapped around napkins suits casual celebrations. Add interest by threading beads, attaching tags with guest names, or tucking in herb sprigs. These organic materials complement farm-to-table dining trends while remaining budget-conscious.
Paper napkin rings offer endless customization. Cut decorative paper into strips, form circles with glue or tape, then add embellishments. Stamps, stickers, or hand-drawn designs personalize each one. Create assembly line efficiency by completing each step for all rings before moving to the next step.
Unexpected materials make memorable napkin rings:
- Button loops: Thread vintage buttons onto elastic cord
- Wire words: Shape wire into words like “love” or guest initials
- Mini wreaths: Form tiny circles from artificial greenery
- Ribbon roses: Roll satin ribbon into rosettes, secure with glue
Small favor displays
Favors can serve double duty as table decorations when displayed creatively. Arrange small boxes or bags in geometric patterns at table centers. Stack them in pyramids or line them along runners for visual impact before guests claim them.
Clear containers showcase edible favors beautifully. Layer colorful candies in small jars, creating rainbow effects that complement color schemes. These displays work as decorations throughout dinner, then guests take them home afterward.
Favors attached to place cards eliminate separate display needs. Tie small items like tea bags, seed packets, or wrapped chocolates to name cards with ribbon. This combination reduces table clutter while ensuring every guest receives their favor.
Lighting elements beyond candles
String lights transform any space affordably. Battery-operated versions eliminate cord concerns, allowing placement anywhere. Weave them through centerpieces, under table edges, or overhead for ambient lighting that photographs beautifully.
Paper lanterns cost little but create significant visual impact. Hang at varying heights or place directly on tables as luminous sculptures. LED tea lights inside provide safe illumination. Choose colors matching your palette or classic white for timeless elegance.
Mason jars filled with battery-operated fairy lights create magical atmosphere. Wrap jars with lace, paint them in wedding colors, or leave clear for simple beauty. These portable light sources work indoors or out without fire concerns.
Coordinating colors throughout
Repetition of colors at different scales creates professional-looking coherence. If using blush pink roses in centerpieces, echo that shade in napkins, ribbon, or scatter. This doesn’t mean everything must match exactly – slight variations add depth while maintaining harmony.
Spray paint provides instant color coordination for disparate elements. Transform thrift store vases, frames, or candleholders into unified collections with metallic or colored spray paint. Several thin coats prevent drips while ensuring even coverage.
Test color combinations before committing to large quantities. What appears beautiful on Pinterest might clash with your venue’s existing colors. Create sample place settings photographing them in your venue’s lighting if possible. Natural and artificial light can dramatically alter color perception.
Final Thoughts on DIY Success
Creating your own wedding table decorations requires planning, patience, and realistic expectations about your available time and skills. The projects shared here prove that stunning results don’t demand professional expertise or excessive spending. What matters most is infusing your personality into every carefully crafted detail.
Starting early and staying organized throughout the process prevents overwhelming yourself as your wedding approaches. Those handmade touches – whether perfect or slightly imperfect – tell your unique story in ways mass-produced decorations never could. Your guests will appreciate the thought and effort behind each element, and you’ll treasure the memories of bringing your vision to life with your own hands. Years from now, you’ll look at photos and remember not just how beautiful everything looked, but the joy of creating something meaningful for your special day.
Frequently Asked Questions
Q: How far in advance should I start making DIY wedding decorations?
A: Begin at least three months before your wedding date. This timeline allows for ordering supplies, making mistakes, and completing projects without rushing. Items like paper goods and artificial flower arrangements can be made even earlier.
Q: What’s the average cost savings when making your own table decorations?
A: Most couples save 50-70% compared to professional decorating services. A professionally designed centerpiece might cost $75-150, while DIY versions using similar materials typically cost $15-30.
Q: Which DIY decorations are easiest for beginners with no crafting experience?
A: Floating candle arrangements, simple ribbon-tied napkins, and scattered rose petals require minimal skill. Printed place cards with hand-drawn borders and mason jar centerpieces also offer foolproof results for novice crafters.
Q: Can I make decorations ahead if using fresh flowers?
A: Fresh flower arrangements should be made 1-2 days before your wedding maximum. However, you can prepare containers, cut foam, organize tools, and practice techniques weeks in advance using inexpensive flowers.
Q: What tools are absolutely essential for DIY wedding decorations?
A: A quality hot glue gun, sharp scissors, wire cutters, and floral tape handle most projects. Double-sided tape, fishing line, and a variety of ribbons round out the basic toolkit.
Q: How do I ensure all my table decorations look cohesive?
A: Choose 2-3 main colors and repeat them throughout all elements. Use similar materials across different projects, like incorporating the same lace on candle jars and napkin rings. Create one complete table setup as your template.
Q: Should I make extras in case something breaks or goes wrong?
A: Yes, create 10-15% extra of small items like place cards and favors. For centerpieces, have materials for one or two additional arrangements. This buffer prevents panic if something gets damaged during transport or setup.
Q: What’s the best way to transport DIY decorations to the venue?
A: Pack decorations in clearly labeled boxes with fragile items wrapped in tissue. Create a detailed inventory list and setup diagram. Transport delicate items yourself rather than trusting them to others. Arrive early for unhurried setup.